In most cases, an EventPro Training or Support Specialist will provide you with a database that has been converted from a previous database and/or filled with information that you have provided.
You need to restore that database to the SQL Server before proceeding with EventPro installation.
With this process, you will be restoring the existing database over the new "placeholder" database you just created in the previous step.
Typically, the database is sent as a .BAK file, which you can restore in SQL Server Management Studio (SSMS).
Ensure that the existing database is stored on the same machine as SQL Server.
1.Run SQL Server Management Studio.
You may have a different version of SQL Server Management Studio than that depicted below, but the functions and settings should be essentially the same.
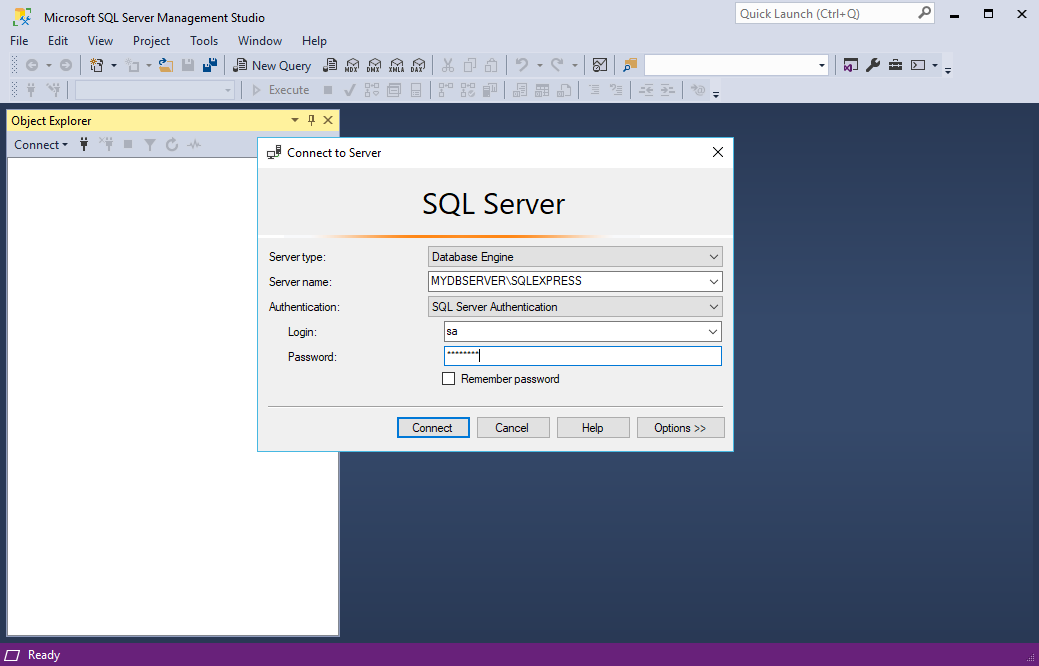
2.Connect to Server:
Although you created the database as User1, you can restore the database as the Windows Administrator User or the sa user.
a.Ensure that the correct Server name is selected (Network Computer Name\Named Instance, e.g. MYDBSERVER\SQLEXPRESS).
b.Choose the Authentication Mode: Windows Authentication or SQL Server Authentication. If applicable, enter the SQL Server Authentication Login and Password.
(Remember that you specified the Authentication Mode when Installing SQL Server earlier.)
c.Click Connect.
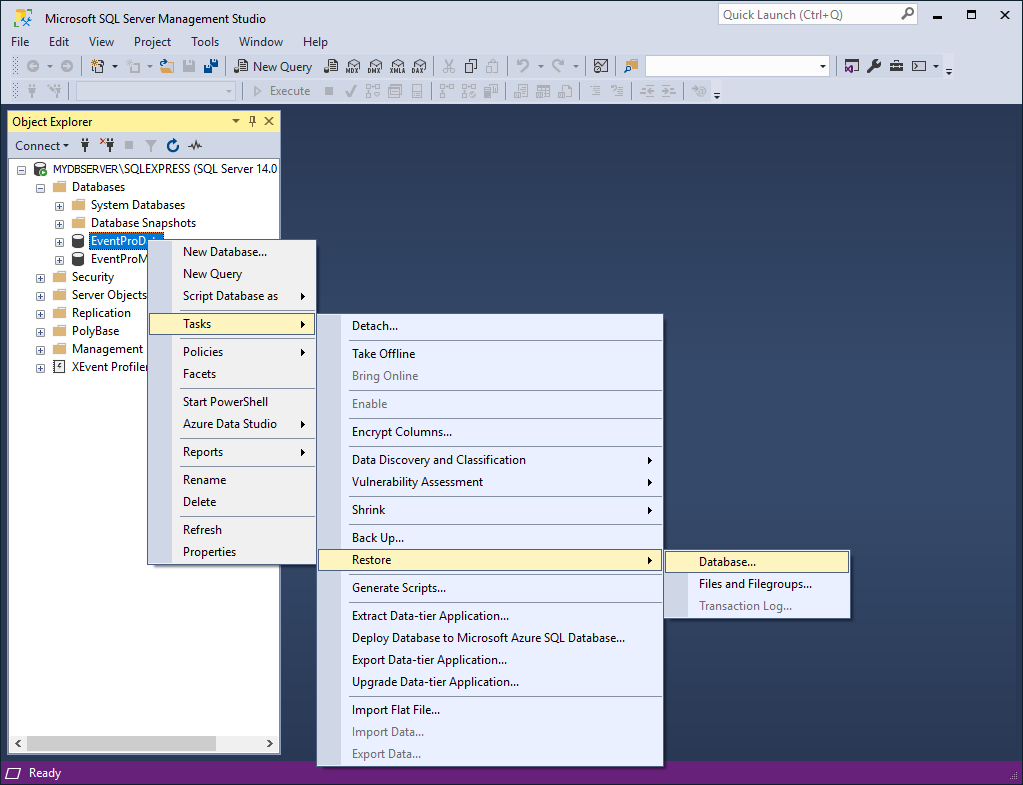
3.In the Object Explorer panel of Microsoft SQL Server Management Studio, expand the Databases so that you can see EventProData.
Right-click on EventProData, and select Tasks > Restore > Database.
4.The Restore Database window appears.
5.Under Source, select Device, and click the ellipsis next to the field.
a.The Select Backup Devices form appears.
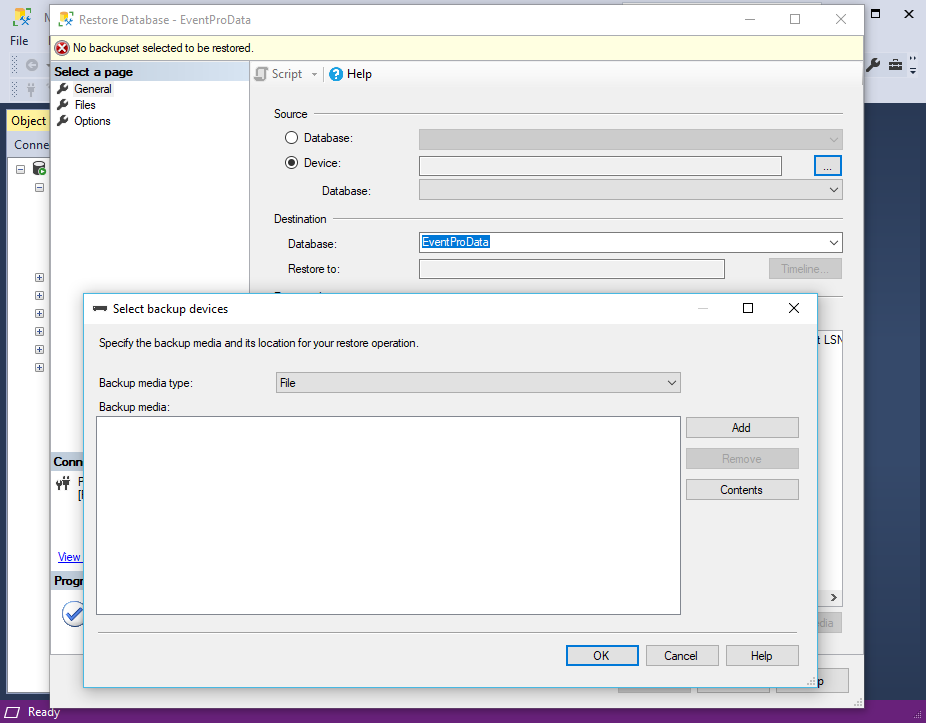
b.Click the Add button. The Locate Backup File window appears.
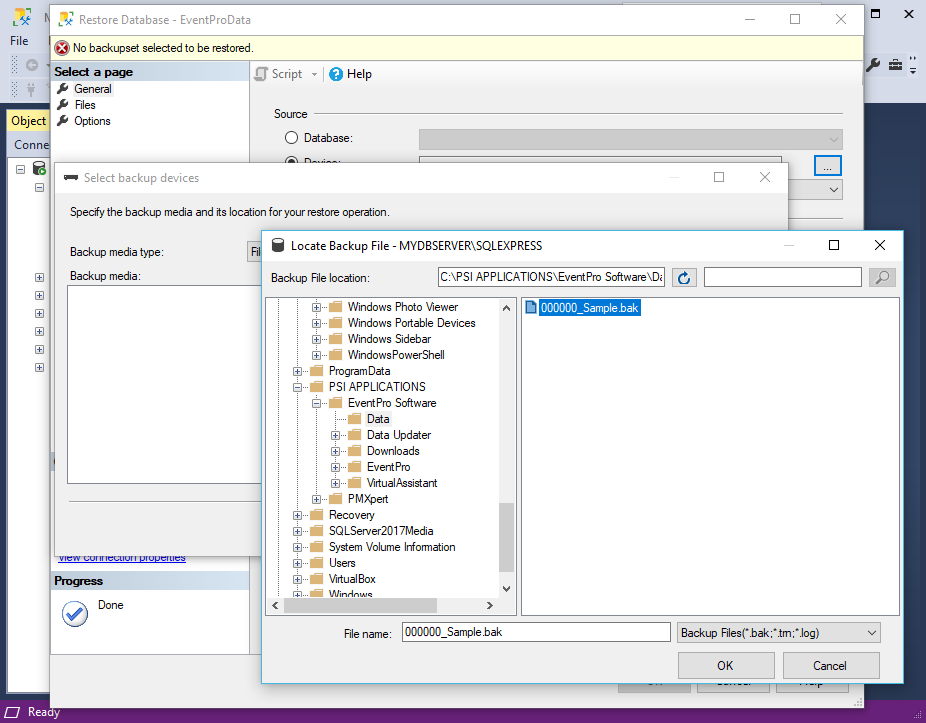
c.In the Locate Backup File window, locate the existing database that your EventPro Trainer sent to you, which should have been saved on the same machine as SQL Server, as noted above.
d.Click OK in the Locate Backup File window, and again in the Specify Backup window.
6.Back in the Restore Database form, under Destination, the Database should be set to EventProData.
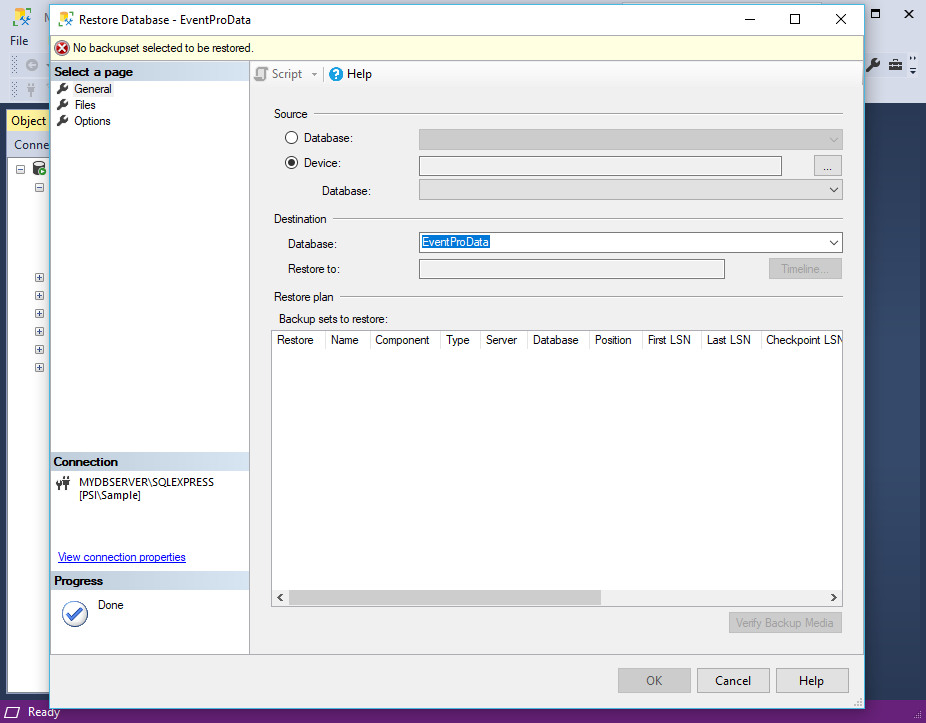
7.Ensure that you have selected the correct Source and Destination.
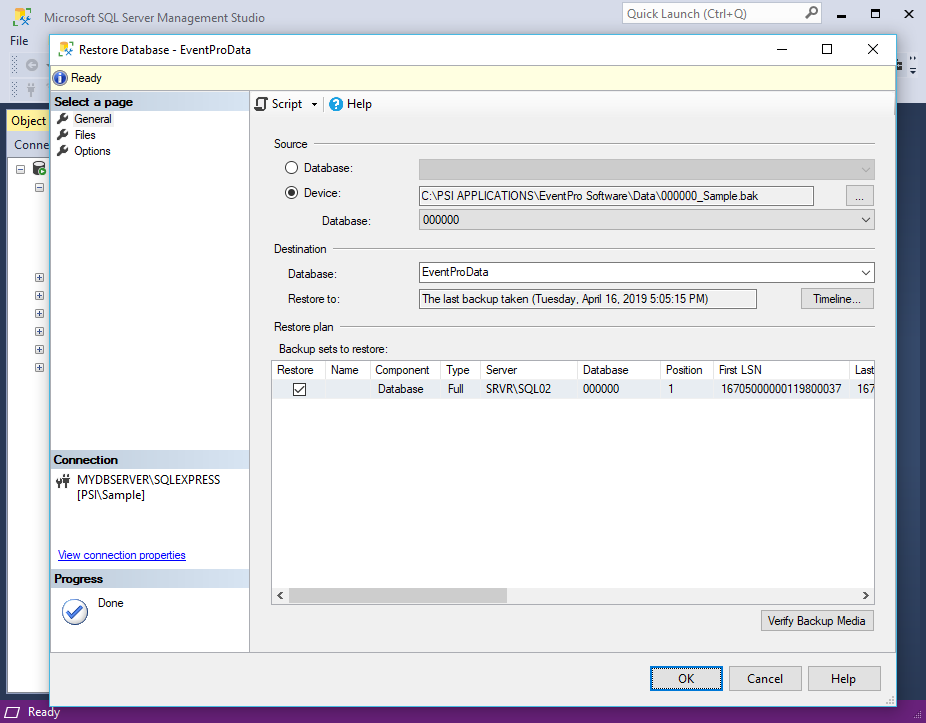
8.In the left Select a Page panel, click on Options.
Select the first checkbox, Overwrite the Existing Database (WITH REPLACE). (In this situation, we want the restored, prepared database from EventPro Training/Support to overwrite the blank "placeholder" database that we created in the previous step.)
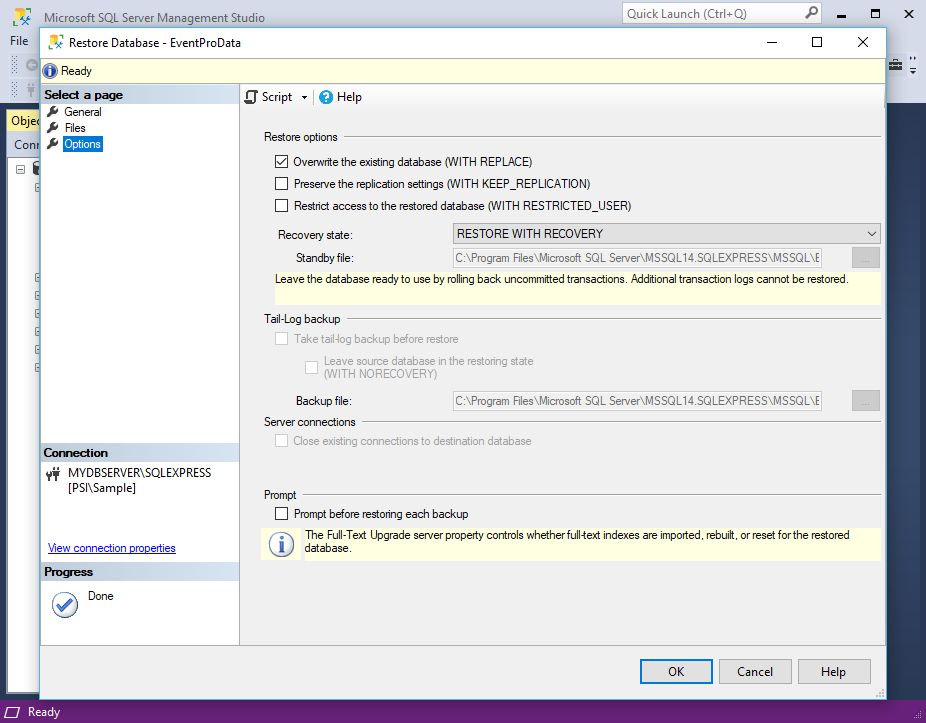
9.Click OK at the bottom of the Restore Database dialog to begin the restore process.
10.When the restore is complete, you should receive a success dialog. Click OK.
11.You can now proceed to Change SQL User.