Give Database Rights to Users for EventPro On-Prem Active Directory Integration |
Scroll Prev Top Next More |
1.If you are not already in SQL Server Management Studio, run it now.
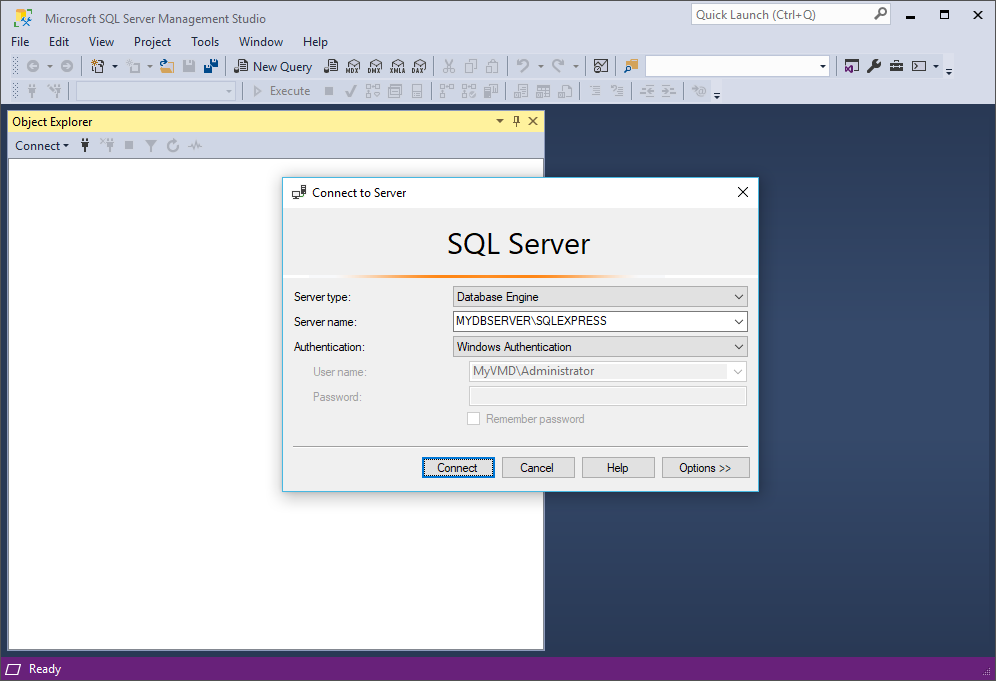
a.In the Connect to Server dialog, ensure that the correct Server name is selected (Network Computer Name\Named Instance, e.g. MYDBSERVER\SQLEXPRESS).
b.Select either Windows Authentication or SQL Server Authentication. If you choose SQL Server Authentication, enter the User Name and Password.
(Remember that when installing SQL Server earlier, you chose between Windows Authentication and Mixed Mode (SQL Server + Windows Authentication), and set the password for the sa account.)
c.Click Connect.
2.In the Object Explorer panel of SQL Server Management Studio, go to Security > Logins.
3.Right-click the Logins folder and select New Login.
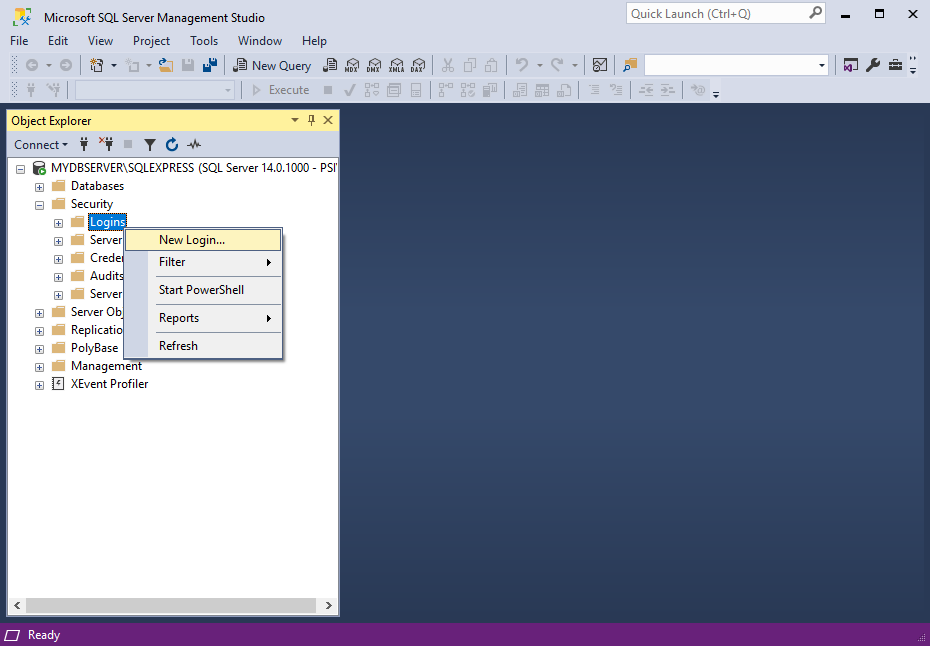
4.The Login - New form appears.
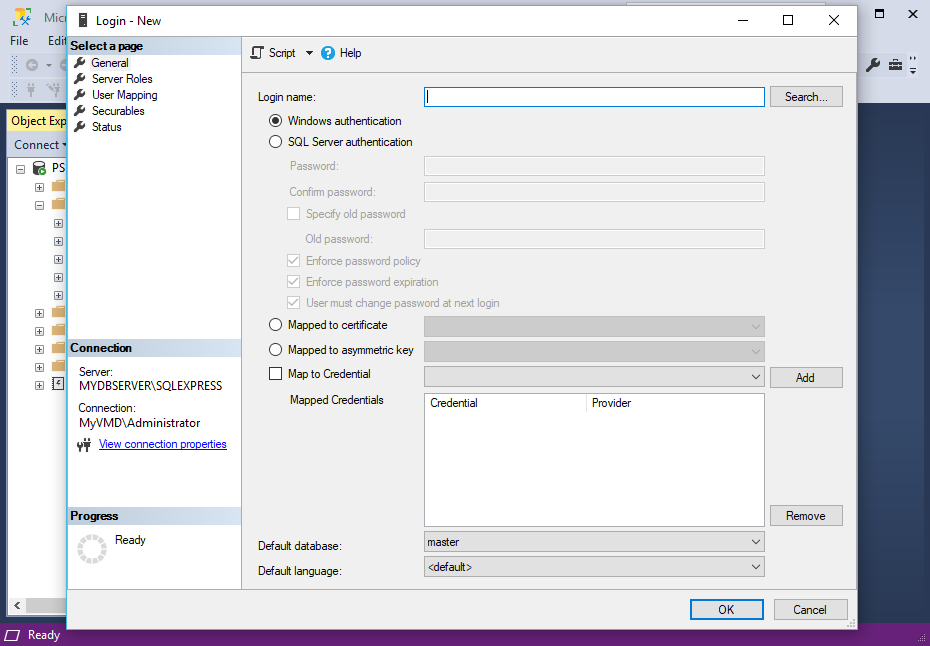
5.Select the radio button next to Windows Authentication to indicate that you want Users to connect to the SQL Server Instance using Windows Authentication.
6.You now need to find the EventPro Security Groups that you created back in Create Active Directory Groups for Integration.
a.Click the Search button next to the Login Name field. The Select User or Group window appears.
b.Click the Object Type button. In the Object Types window, select the Groups checkbox and click OK.
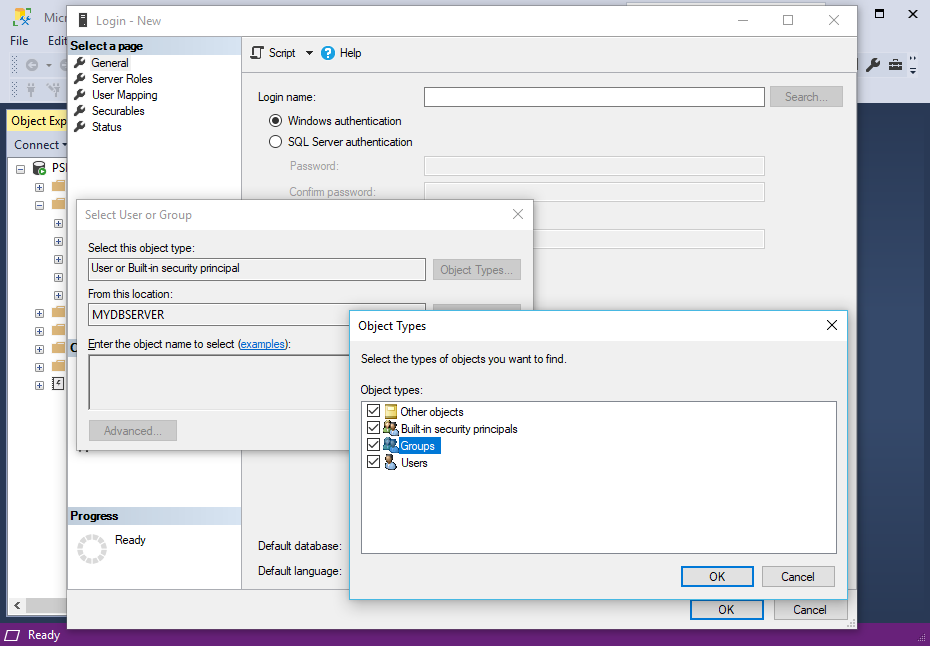
c.Back in the Select User or Group window, click the Locations button.
Select the correct Domain in the Locations window, and click OK. This is the Domain in which you created the EventPro User Security groups.
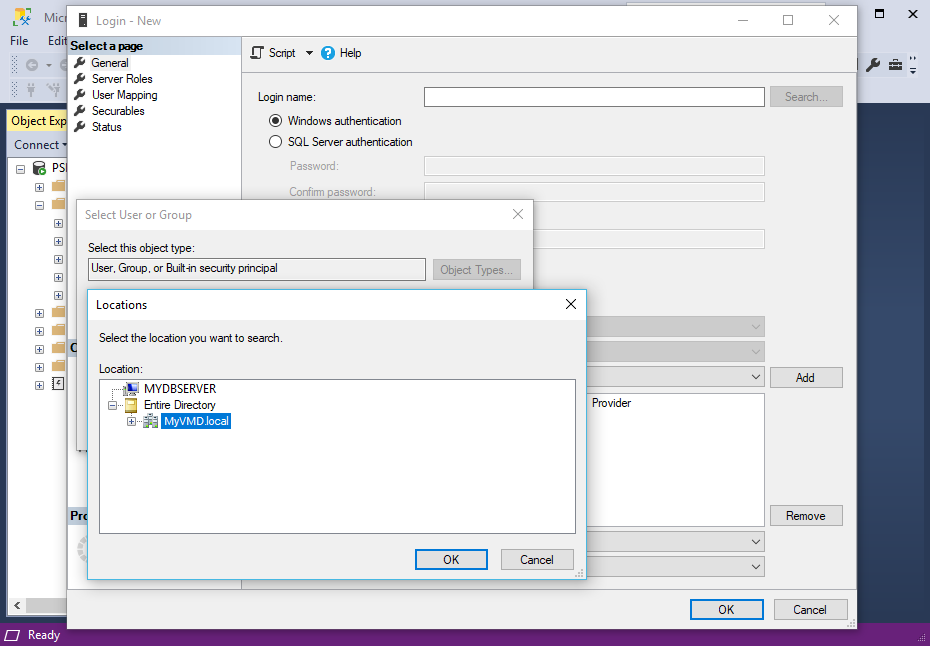
d.Finally, enter a search term in the bottom field of the Select User or Group window, e.g. EventPro, and click the Check Names button.
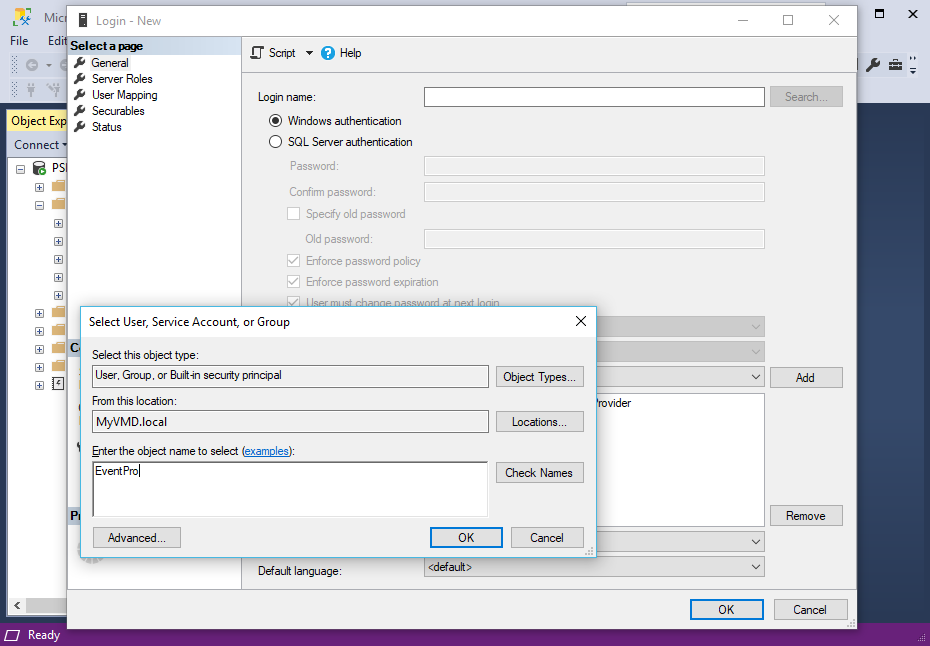
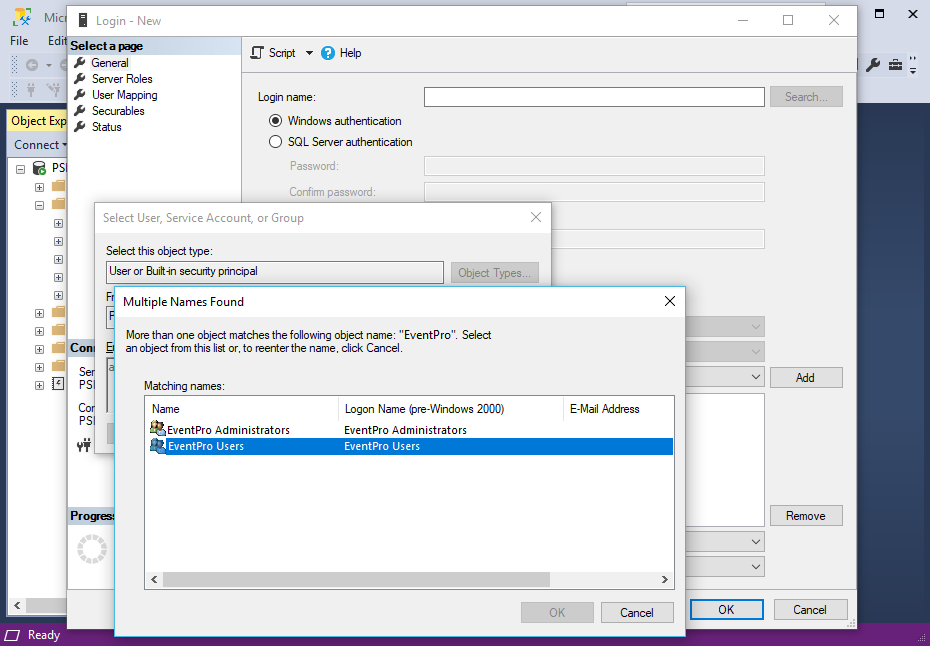
e.If there are multiple matching results in the Multiple Names Found window, select the group(s) for which you want to assign database rights, and click OK. In this example, we will select the EventPro Users security group.
As you will recall from above, you may have created a broad EventPro Users Security Group with multiple department-based sub-groups nested within it. At this point, assuming you want all the departmental groups to have the same access rights to the database, you can just select the main EventPro Users group to encompass all of the departmental sub-groups within.
f.Click OK in the Select User or Group form to return to Login - New.
7.The Login Name will now be populated with the group you selected.
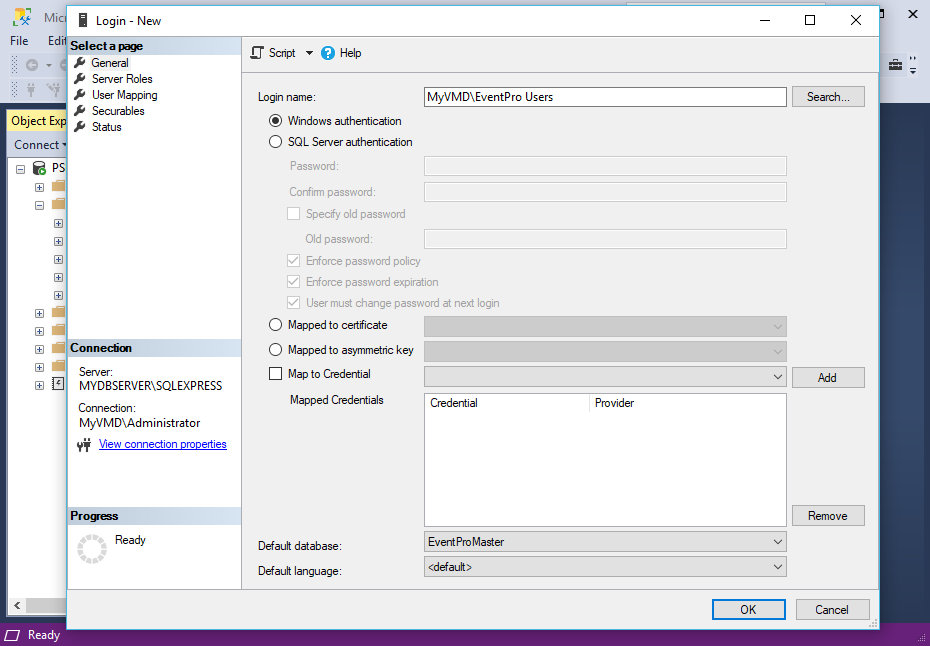
8.Ensure that the Windows Authentication radio button is selected, which you would have done earlier.
9.Near the bottom, you can set the Default Database to EventProMaster.
10.Next, in the Select a Page panel of the Login - New form, select the User Mapping page.
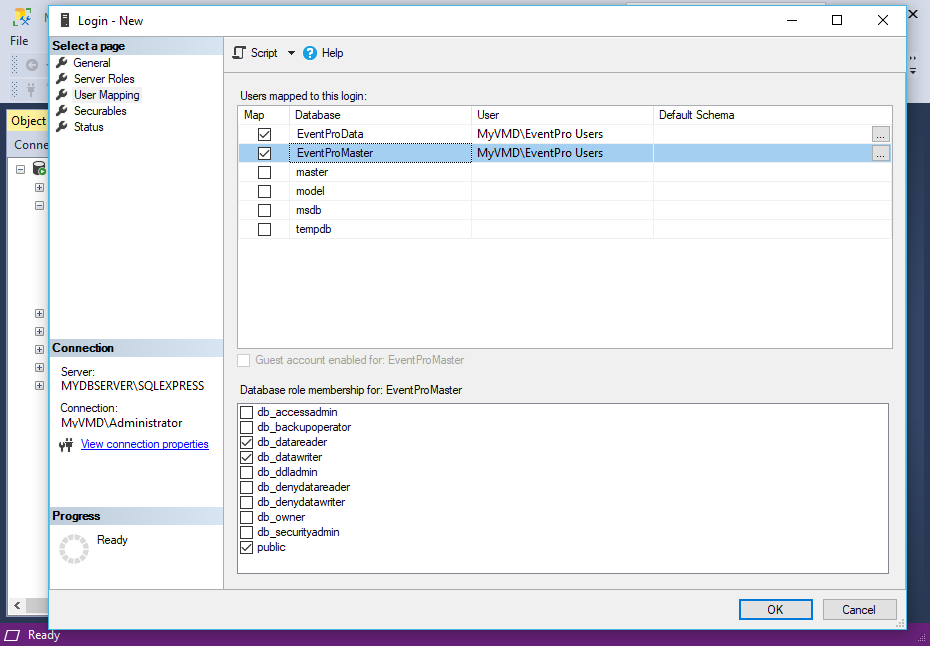
Select the Map checkboxes for the EventProData and EventProMaster databases.
You then need to set the database role membership for each database.
a.Select EventProMaster in the top grid, and select the checkboxes next to db_datareader and db_datawriter below.
b.Next, select EventProData in the top grid, and select the checkboxes next to db_datareader and db_datawriter at the bottom.
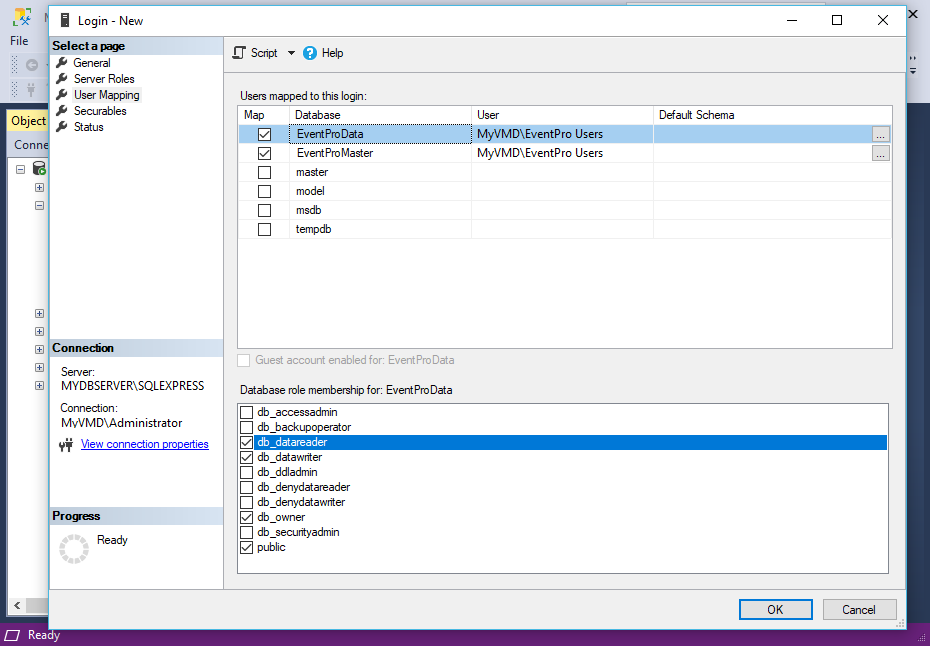
c.You also need to give the db_owner right to at least one Login group, since the db_owner right to EventProData is required for updating EventPro Software with new releases. How you assign the db_owner right depends on who will be performing software updates.
i.Some organizations want only the Administrator to update EventPro Software. In this case, you would typically have an EventPro Administrators Security Group that is separate from an EventPro Users Security Group. You would give db_owner to the EventPro Administrators Login only.
ii.On the other hand, some organizations allow any User - administrator or otherwise - to update EventPro Software. In this case, you would typically create an EventPro Users Group with the EventPro Administrators nested as a sub-group within it. You would then assign db_owner to the EventPro Users Login, thereby giving the ability to update the software to all Users, regular or administrator.
To review how you set up Active Directory Groups, see Create Active Directory Groups for Integration.
11.When you are done with the Login edit form, click OK. The Login will be added under Security > Logins.
12.If necessary, you can add another New Login.
Again, it depends on whether you have the EventPro Administrators Security Group set up as a separate group or nested within the EventPro Users Security Group.
If the EventPro Administrators Security Group is separate, you now need to create a Login for it, repeating the steps above and assigning the db-owner right to EventProData to the EventPro Administrators group.
13.When you are done creating Logins in the SQL Server Management Studio, you can exit it, and proceed to Install EventPro to Server.